
By Marc Laliberté 12 June, 2025
Restoring a Vintage Portrait: Step-by-Step Photo Restoration of Three Women from the Early 20th Century
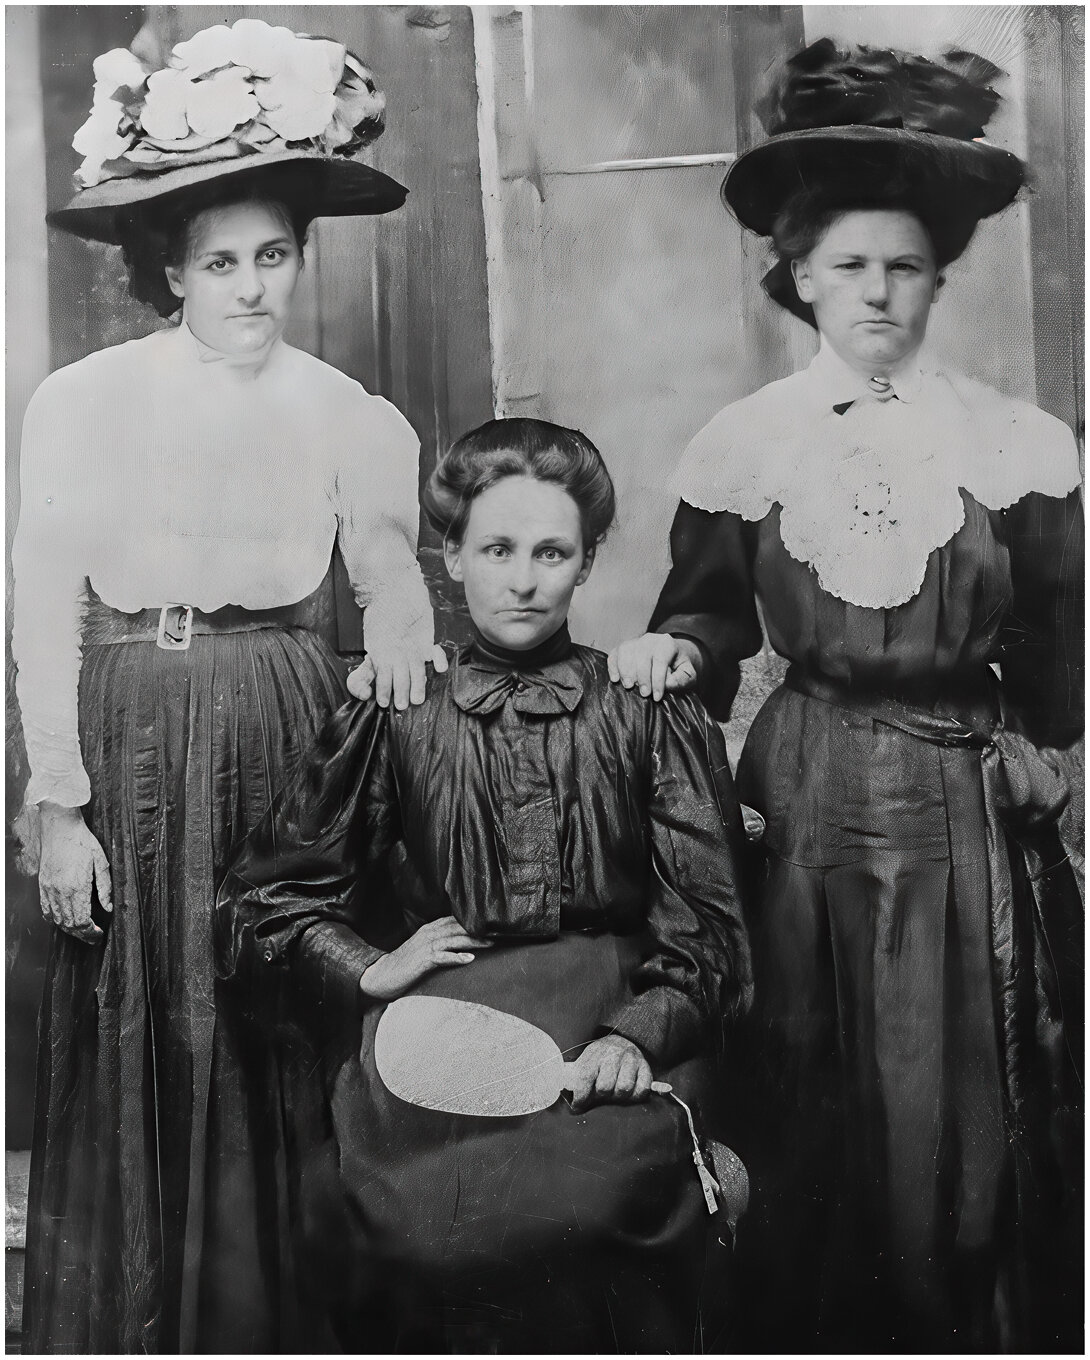
Today, I’m excited to share the restoration process of a beautiful early 20th-century photograph featuring three women posing together. The original photo was faded, scratched heavilty, and showed signs of aging—common issues with vintage prints. Through careful restoration, I brought this piece of history back to life.
Before diving into the steps, I want to mention the digitization process. Since the original photo is quite small (2" x 4"), I used a professional high-resolution camera to capture every detail. The resulting digital file is 11 megapixels, preserving fine textures and allowing for precise restoration work. While web display limits resolution, this high-quality scan ensures the restored image can be printed or enlarged if desired.
Now, let’s walk through the restoration process!
Step 1: Examining the Original Photo
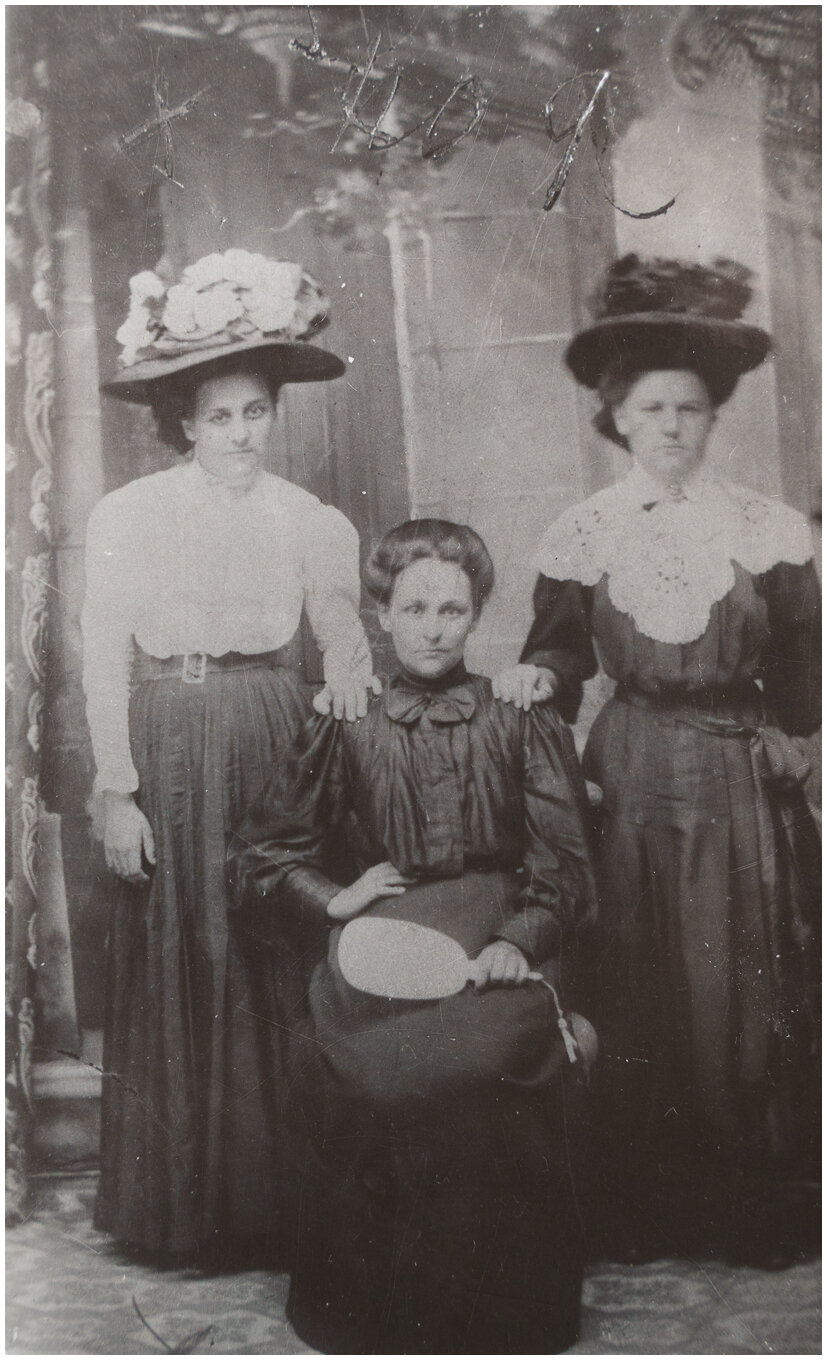
The original photo was heavily faded, with numerous scratches and dust marks. The contrast was weak, making details hard to distinguish.
🔹 Key Improvement: Identified major damage areas to prioritize restoration.
⚠️ Challenge: Balancing preservation of original details while planning repairs and of course the digitization itself. Having the biggest resolution possible and having the possible focus so we don’t lose any quality.
Step 2: Cropping to 4:5 for Better Composition
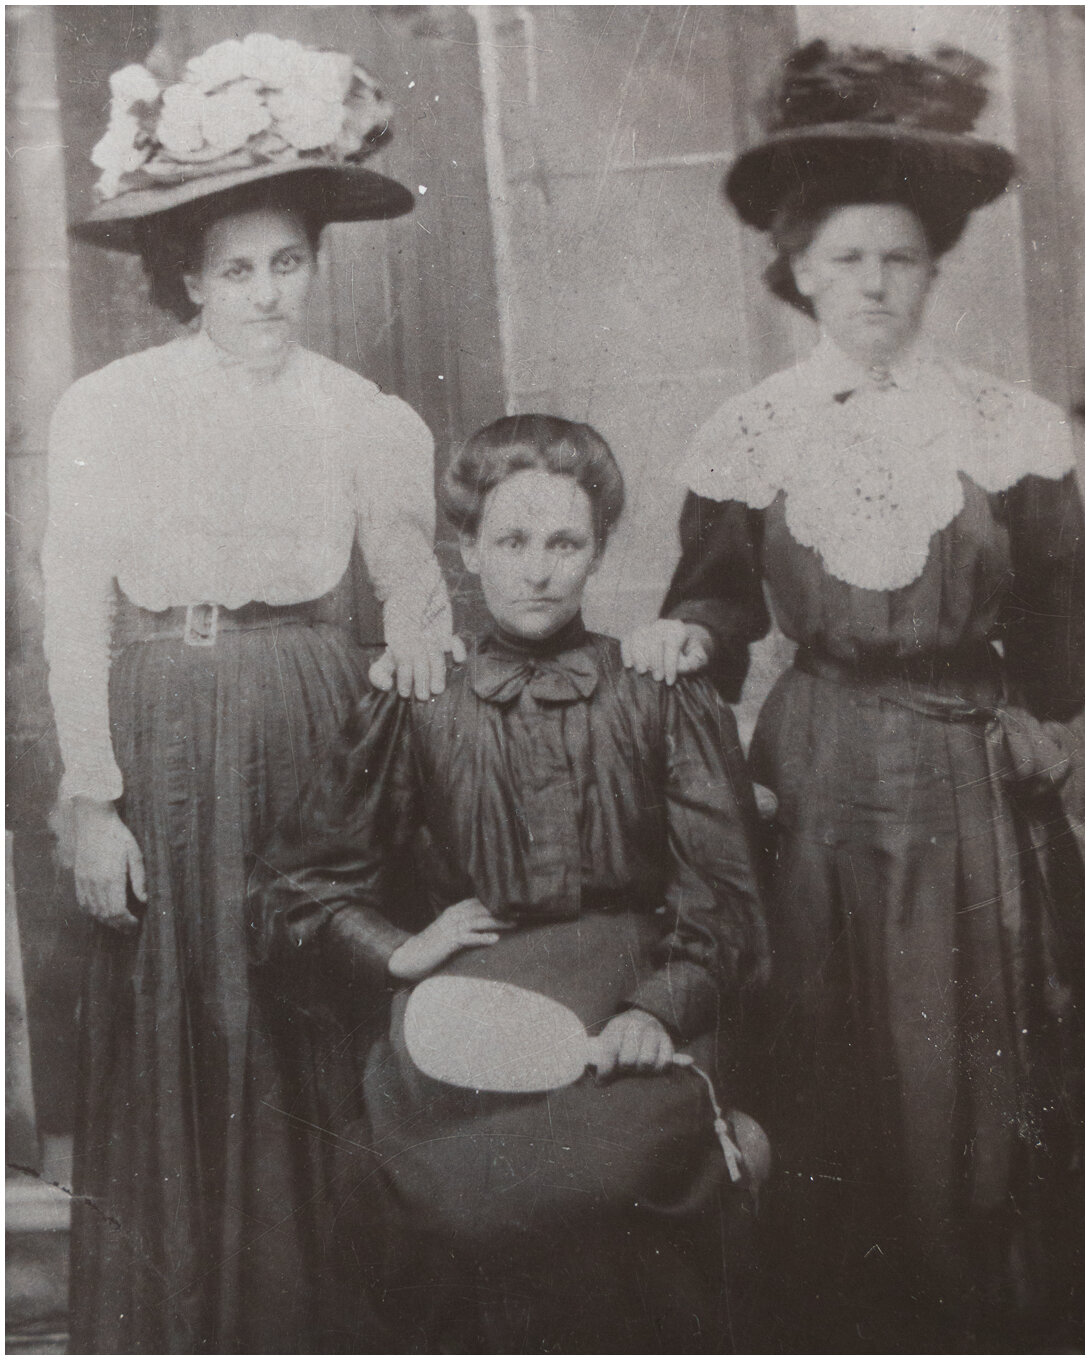
To remove the worst scratches (mostly the one at the top) and emphasize the subjects, I applied a 4:5 crop. This also creates a more balanced composition and a more modern format for sharing.
🔹 Key Improvement: Cleaner framing with distracting elements removed.
⚠️ Challenge: Ensuring the crop didn’t cut off important details.
Step 3: Adjusting Contrast & Manual Scratch Removal
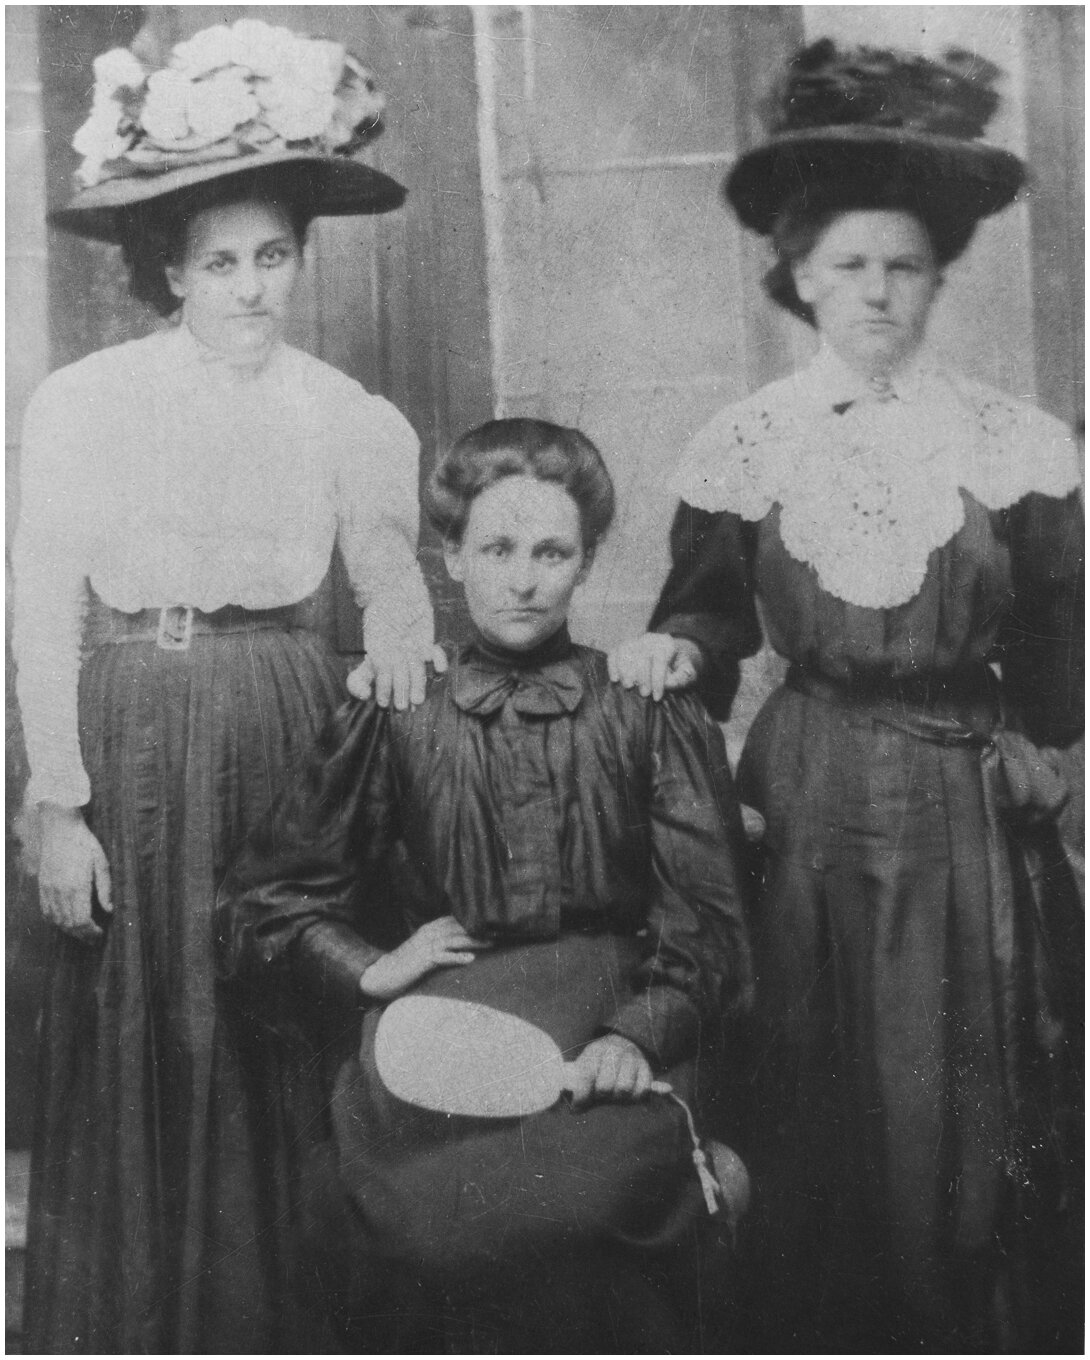
I enhanced the contrast to bring back depth and manually removed the largest scratches. This step already makes the subjects more defined. This will help us in the upcoming steps.
🔹 Key Improvement: Stronger tonal range and reduced visible damage.
⚠️ Challenge: Avoiding over-processing, which can make the image look unnatural
Step 4: Advanced Dust & Scratch Removal
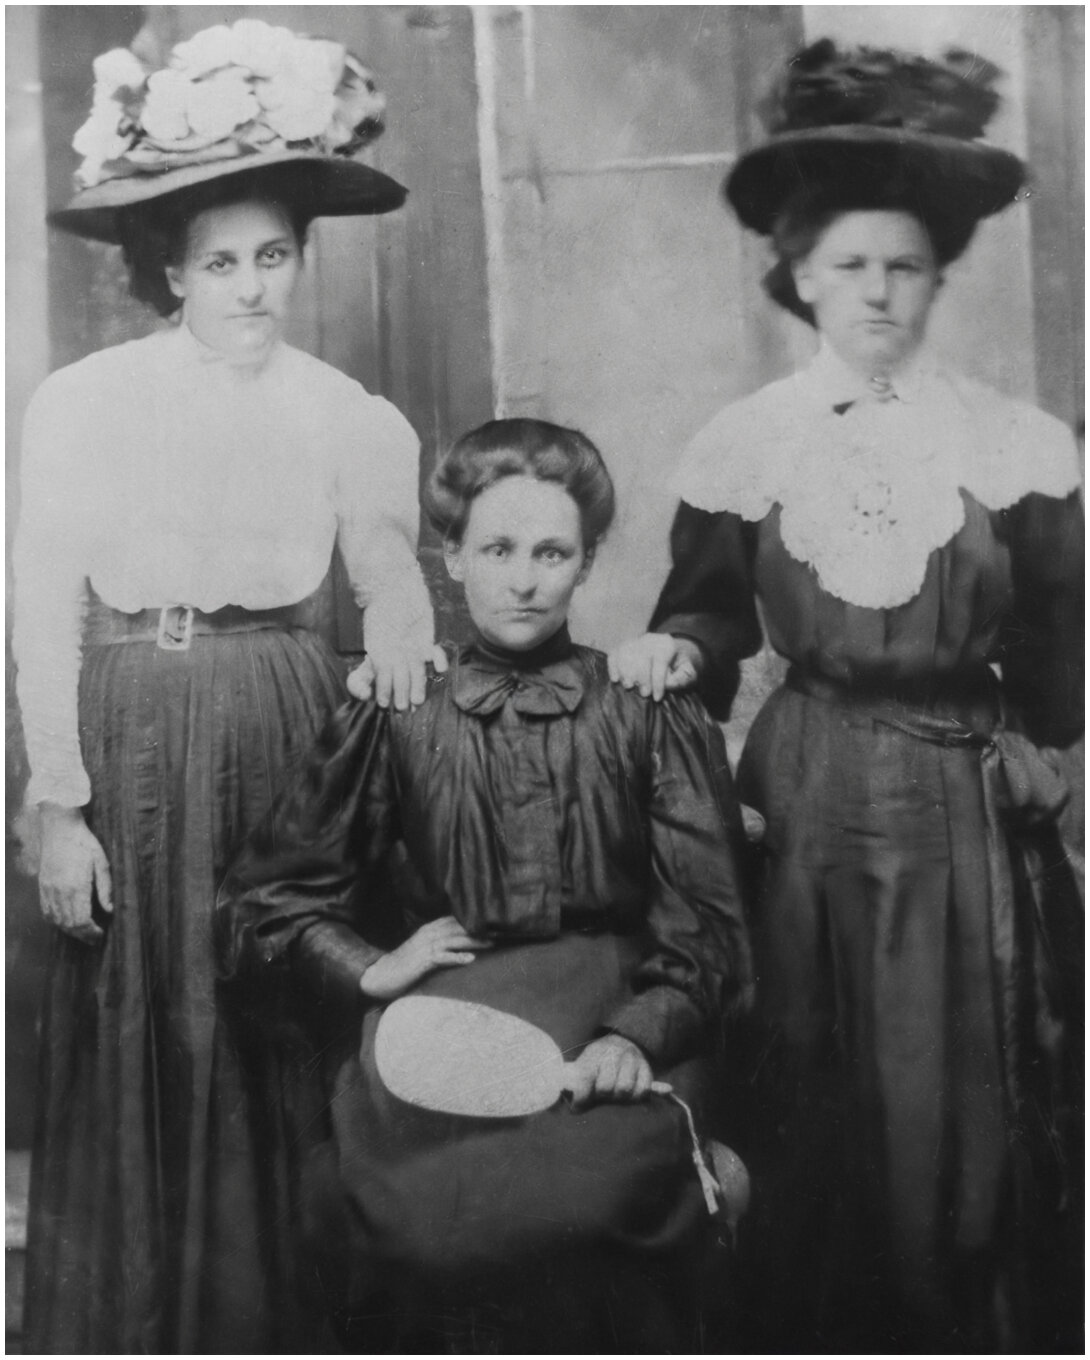
Using specialized tools, I eliminated most remaining dust and scratches while preserving textures like fabric and facial features.
🔹 Key Improvement: A much cleaner image with minimal distractions.
⚠️ Challenge: Retaining fine details (like hair strands) during cleanup.
Step 5: Sharpening for Realism & Detail
A careful focus enhancement brought out finer details—wrinkles in clothing, facial expressions, and background elements—adding realism.
🔹 Key Improvement: Crisper details without artificial “over-sharpened” look.
⚠️ Challenge: Avoiding noise or artifacts while enhancing clarity and keeping the faces as close to the original as possible.
Step 6: Colorization (Final Touch)
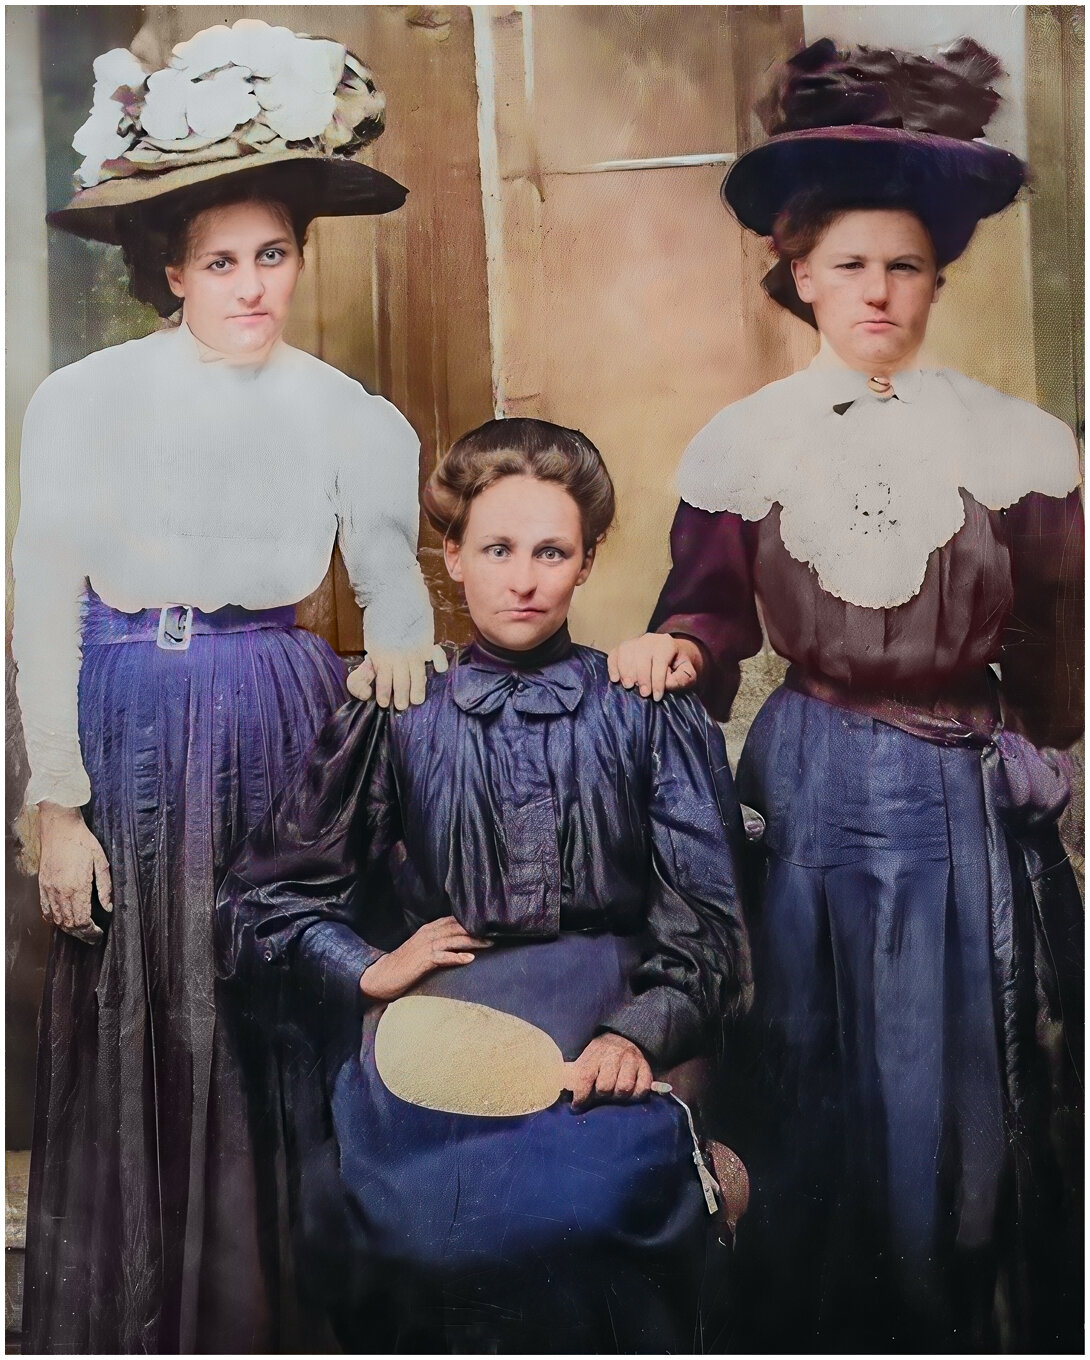
The final step was adding historically accurate colors—subtle skin tones, period-appropriate clothing hues, and a natural background.
🔹 Key Improvement: A vibrant yet believable revival of the scene.
⚠️ Challenge: Ensuring colors remained realistic and not oversaturated.
Final Thoughts
This restoration shows how even a heavily damaged photo can be revived with patience and the right techniques. The high-resolution scan allowed for precise corrections, and each step brought the image closer to its original splendor.
Would you like to see your old photos restored?
Contact me here
or
Check my packages here