
By Marc Laliberté 4 June, 2025
Restoring History: How I Brought a Vintage Countryside Photo Back to Life (Step-by-Step)
Old photos are time machines—every scratch and fading tells a story. Recently, I restored a vintage photo of a woman walking on a dirt road in the countryside. Here’s my 5-step process, with key improvements and challenges encountered.
Step 1: Examining the Original Photo
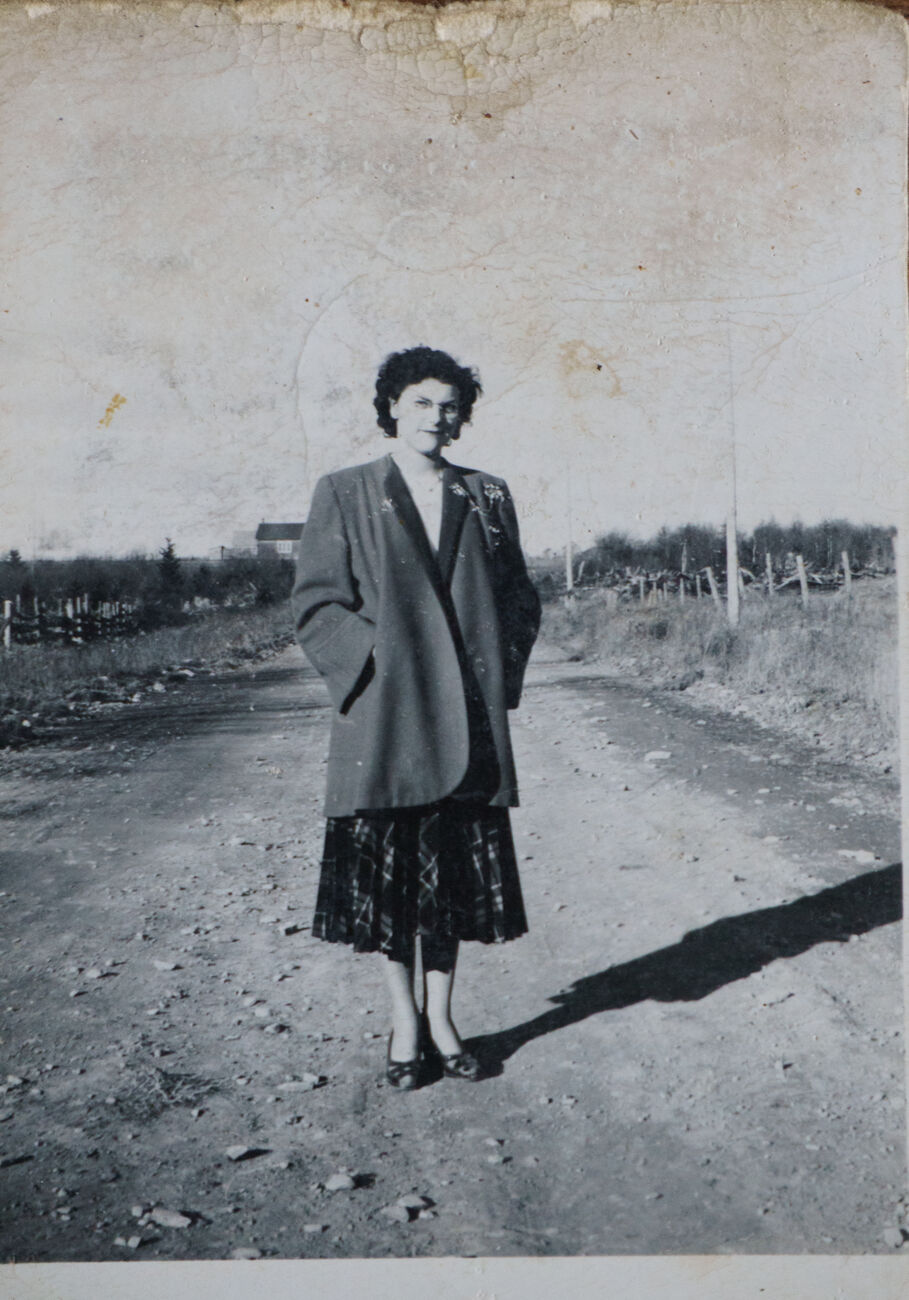
The first step is to examine the photo's condition. This one had deep scratches, dust marks and low contrast - common problems with aging prints. Understanding the damage helps determine the best restoration approach.
Key improvements:
- ✔ High-resolution scanning with my professional camera to preserve details
- ✔ Identification of deep scratches, dust and fading
- ✔ Detection of subtle patterns on the dress and landscape
Main challenge: The heavy damage on the sky made it difficult to distinguish between scratches and original textures.
Step 2: Modern Cropping (4:5 Format)
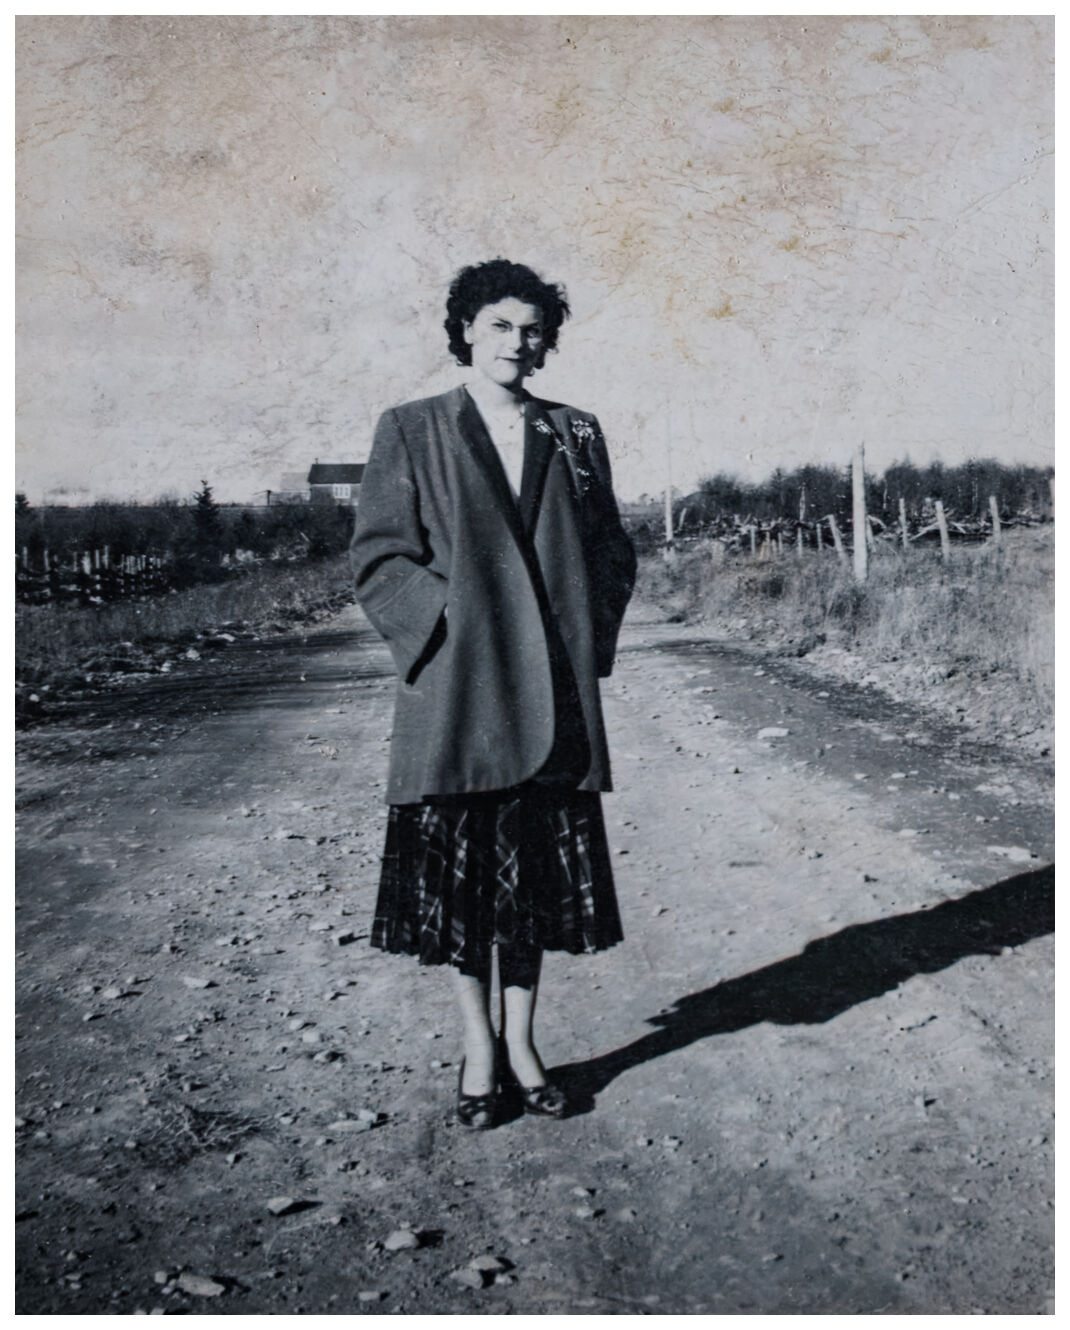
Many old photos have unusual aspect ratios. Cropping to 4:5 format (common on Instagram and modern prints) gives the image a refreshed, balanced composition while highlighting the subject. The new crop quickly removes the large tear at the top of the photo.
Key improvements:
- ✔ Centering on the woman for a stronger focal point
- ✔ Removal of unnecessary empty space
- ✔ Maintaining the balance of the countryside horizon
- ✔ Adding a white border to preserve the original photo look
Main challenge: Avoiding cutting too much of the sky, essential for context.
Step 3: Scratch Repair and Contrast
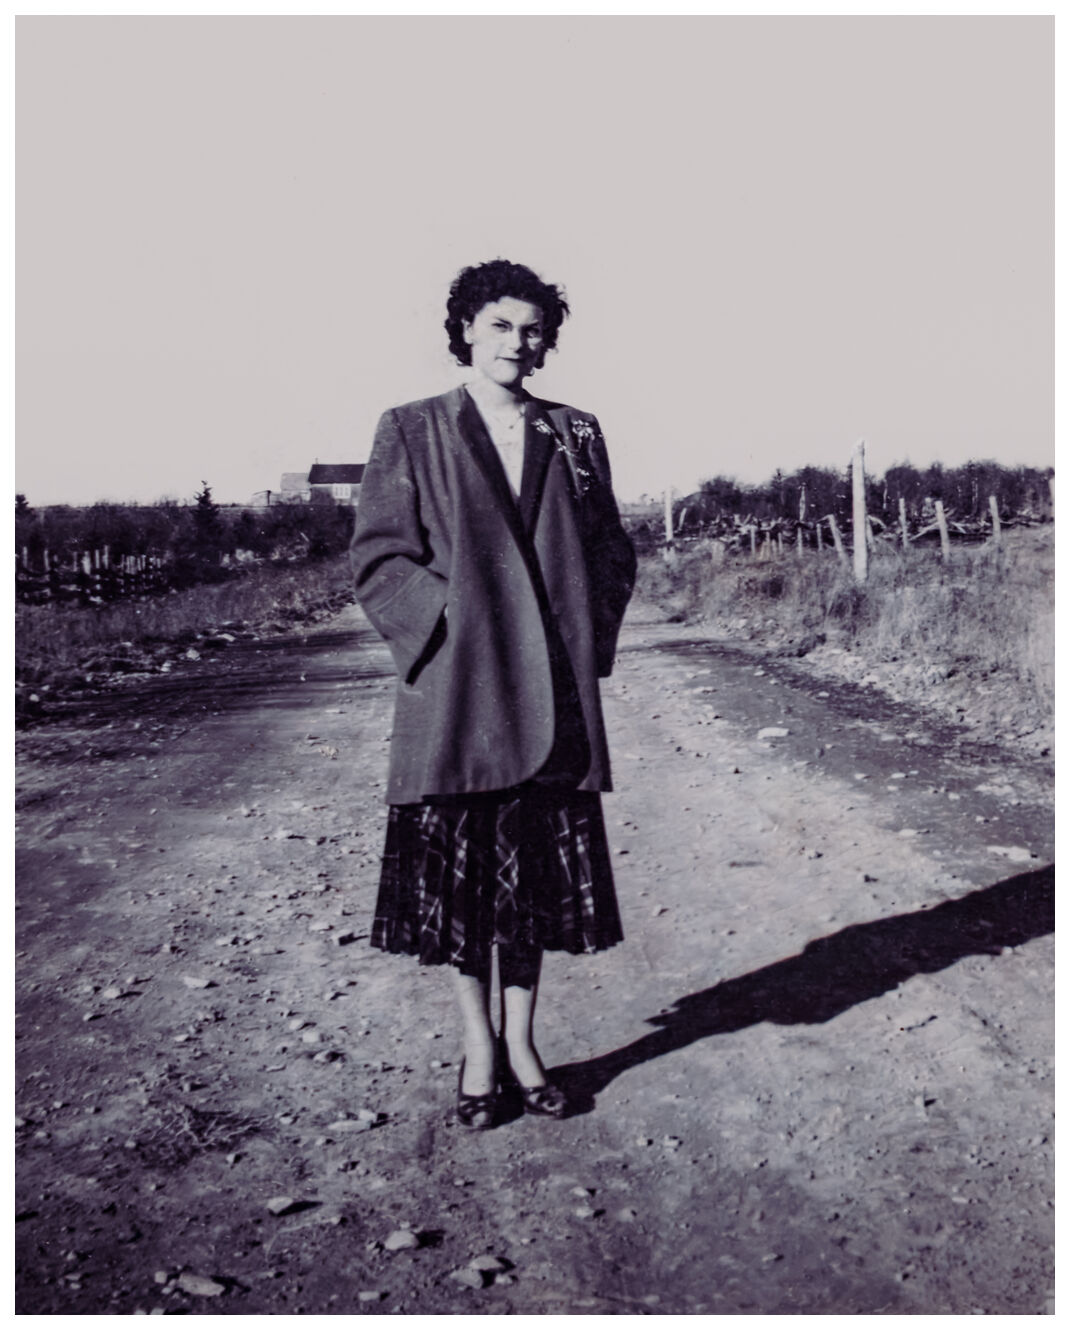
Using specialized tools, I carefully remove scratches, dust and stains while preserving original details. I then adjust brightness, contrast and exposure to restore depth and clarity. I even added a slight rusty brown tint to maintain the vintage feel.
Key improvements:
- ✔ Removal of hundreds of micro-scratches (especially on the sky)
- ✔ Enhanced shadows on the dress for depth
- ✔ Rebalanced neutral tones of the countryside
- ✔ Added a rusty brown tint to maintain vintage tones
Main challenge: The sky required manual retouching to avoid a “blurred” effect.
Step 4: Detail Enhancement
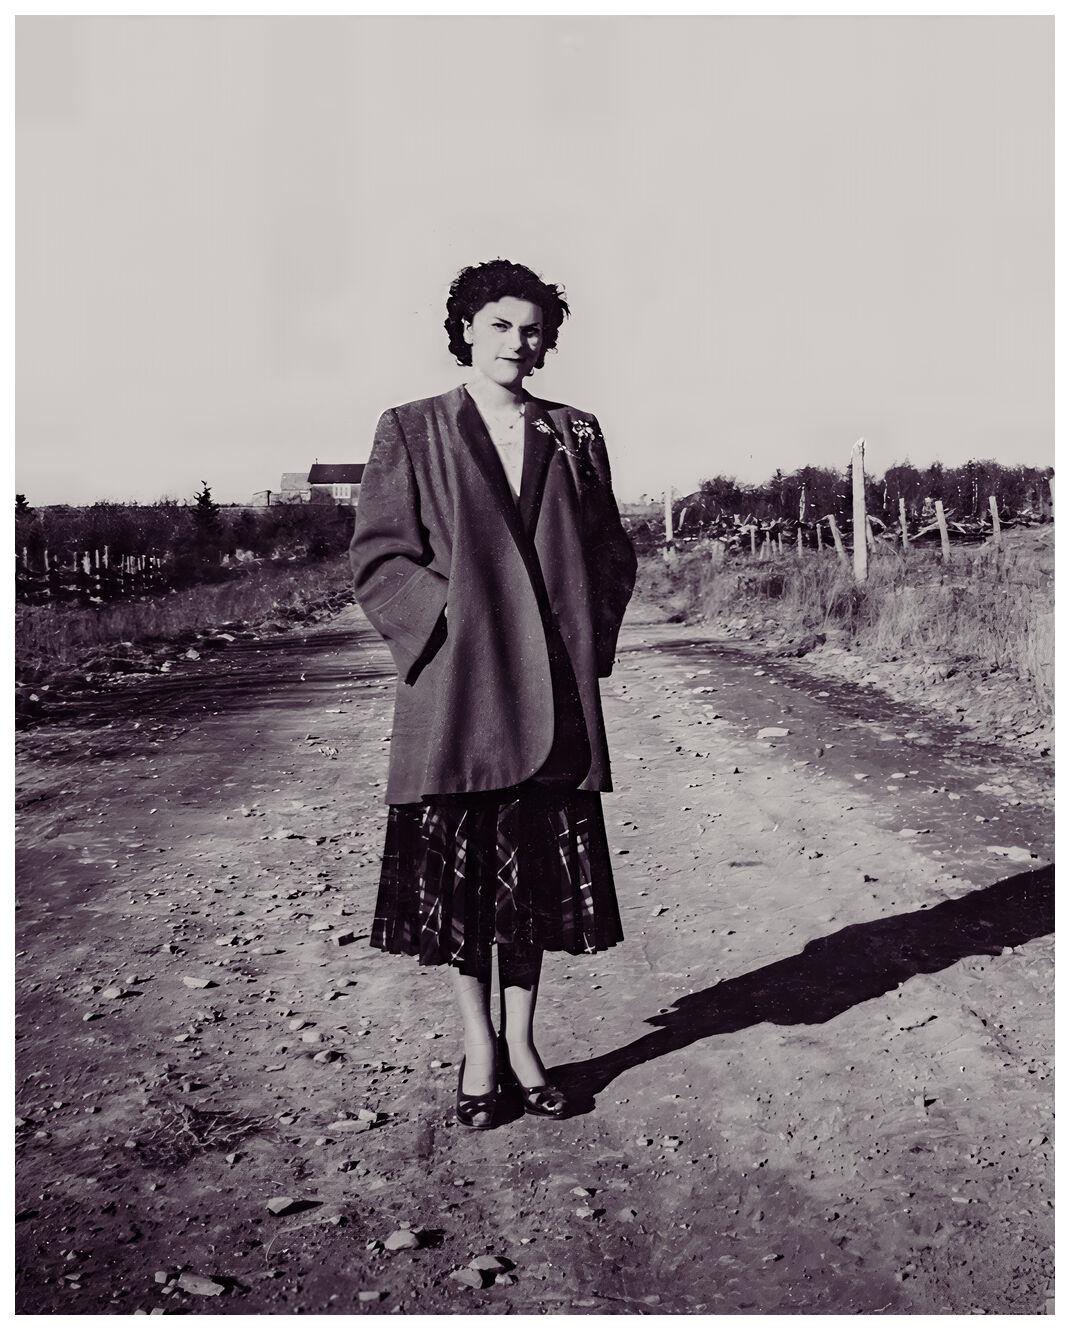
Old photos often lose sharpness over time. By carefully enhancing textures and refining edges, I restore realistic details, whether facial features, clothing folds or background elements.
Key improvements:
- ✔ Accentuated dress folds
- ✔ Restored road texture
- ✔ Subtle facial enhancement (without overdoing it)
Main challenge: Over-sharpening would make the landscape look too artificial. Some areas required manual work to preserve details and realism
Step 5: Colorization (Optional)
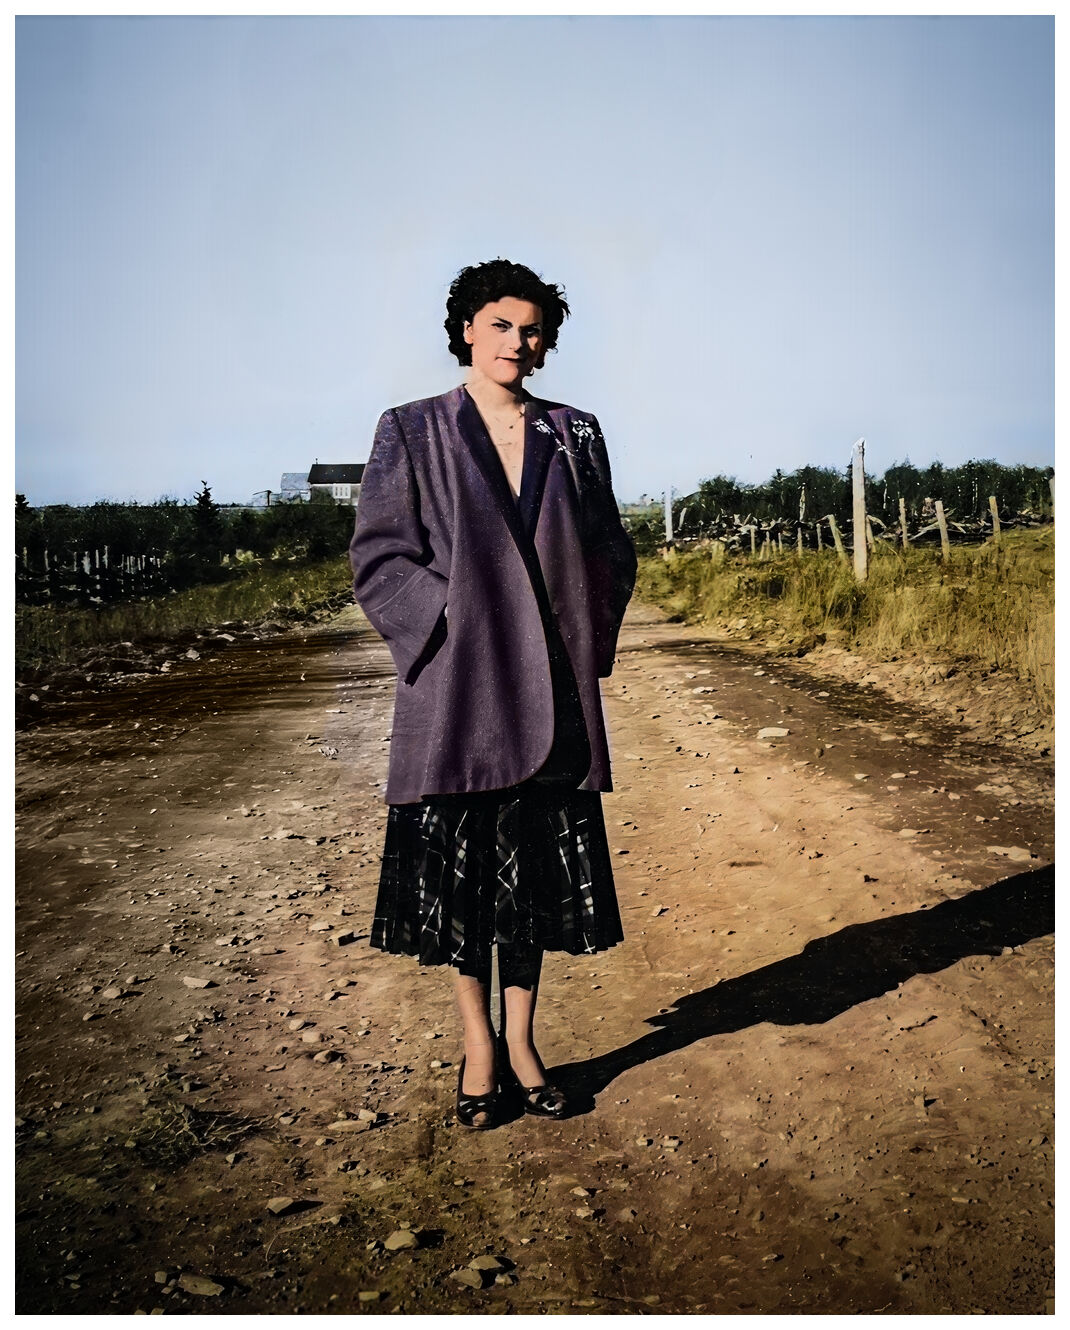
Key improvements:
- ✔ Soft pastel tones for a timeless effect
- ✔ Pale blue sky and earthy tones for the road
- ✔ Hand-adjusted colors on the dress
Main challenge: Avoiding colors that are too vibrant
Final Result
The restored photo respects the original while looking fresh.
Each step required patience—but seeing her standing on that road again? Priceless.
Want to restore a photo?
Contact me hereor
Check my packages here