
By Marc Laliberté 31 May, 2025
Restoring History: Step-by-Step Restoration of a 1934 Chevrolet Master Photo
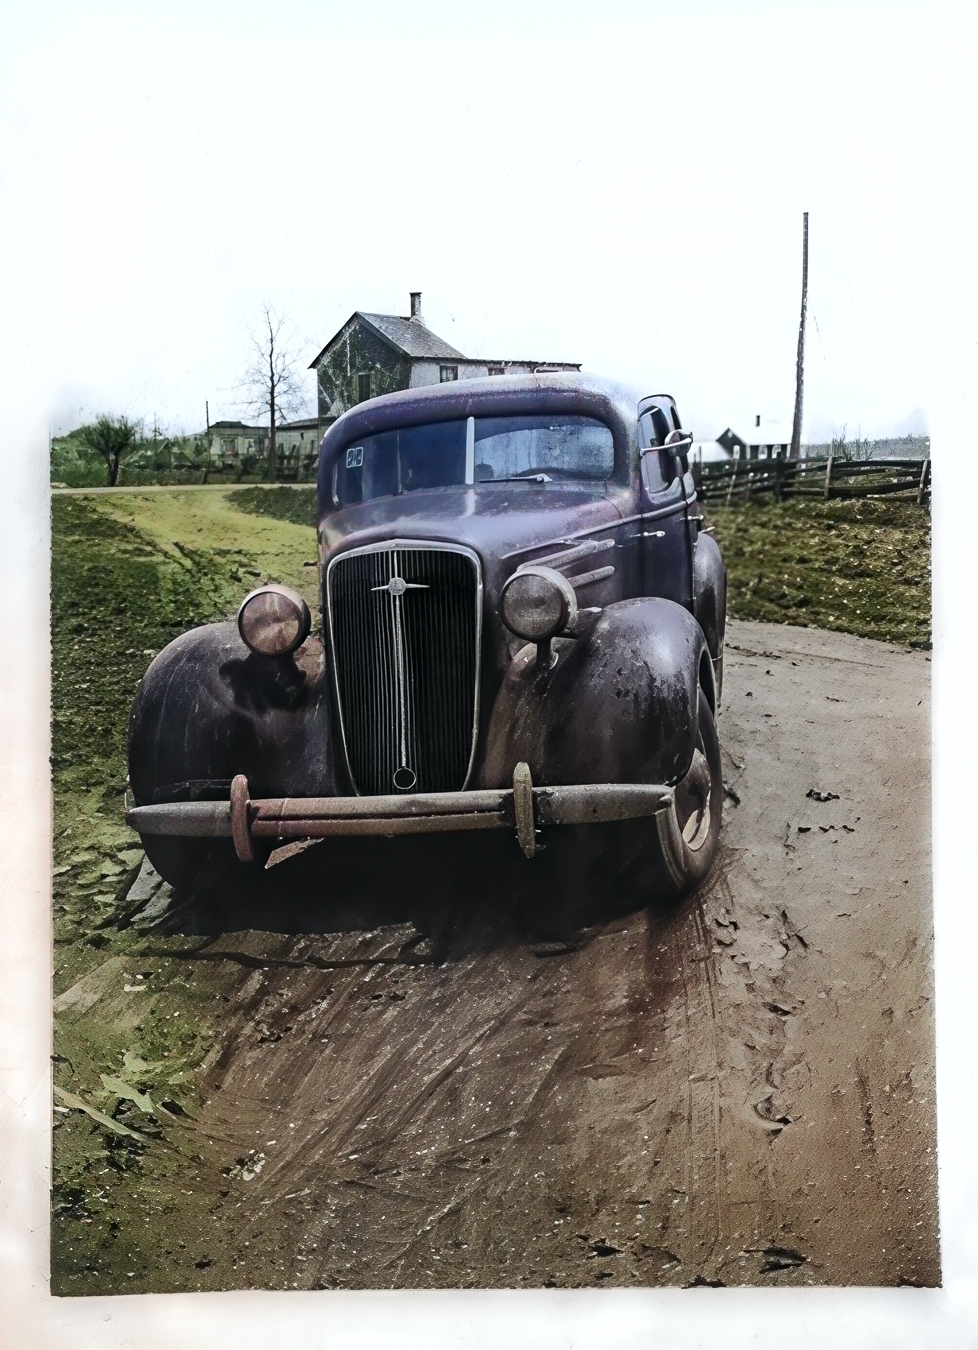
Old photos aren’t just images - they’re fragments of history. But over time, scratches, fading, and damage can diminish their beauty. In this article, I’ll reveal the 5-step restoration process of a 1934 Chevrolet Master photo, transforming a damaged image into a vibrant, realistic memory.
Step 1: Assessing the Original Photo
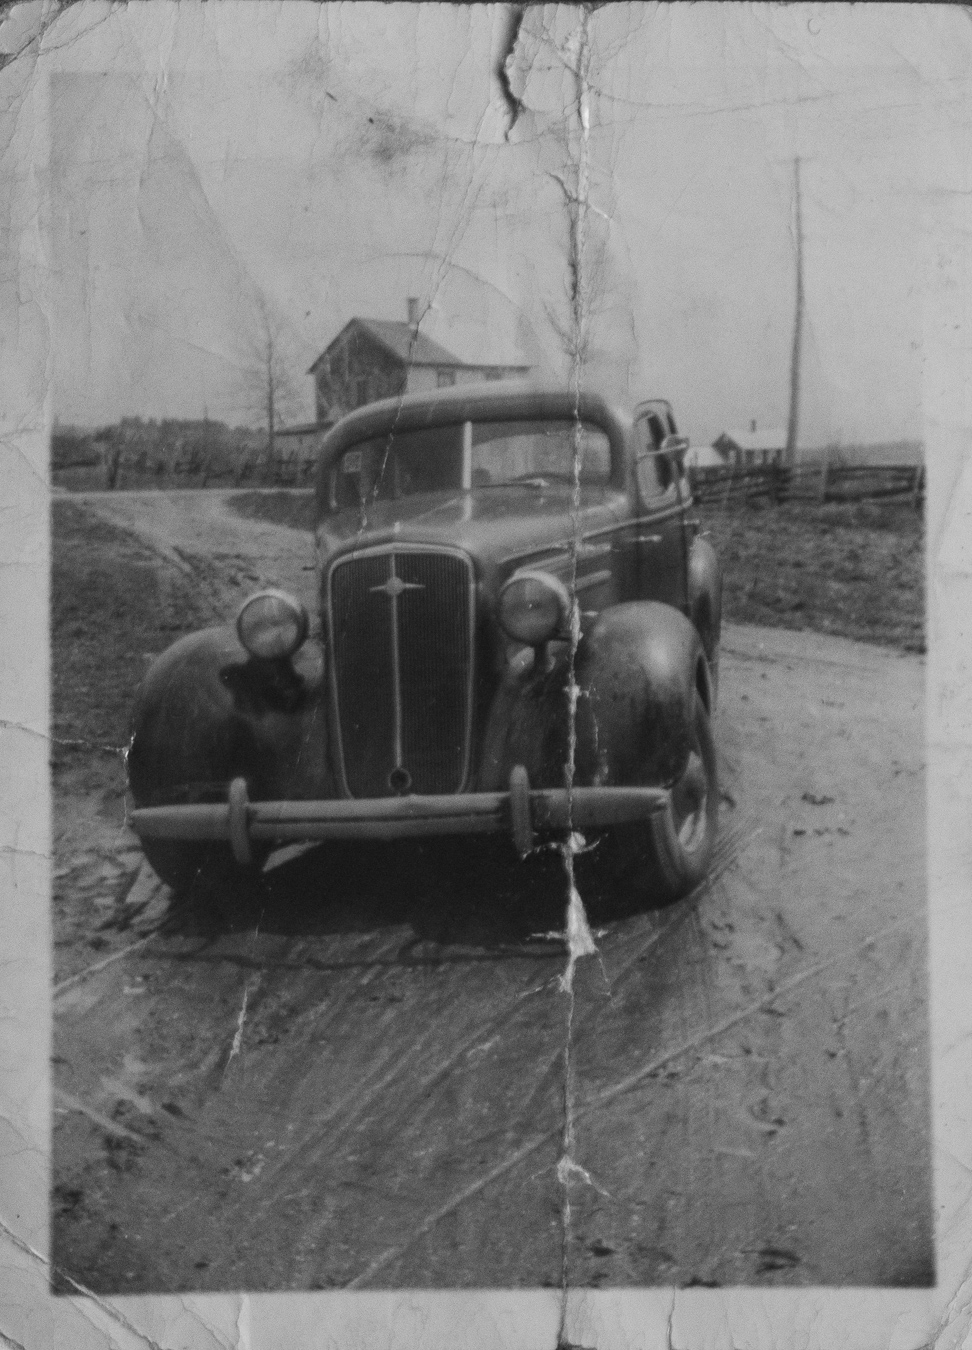
The restoration begins with the original photo - a black and white image of a 1934 Chevrolet Master, marked by years of wear.
Main Issues:
Deep scratches and folds from improper storage
Faded details, especially in shadows and highlights
Dust and small tears along the edges
Approach:
Before any editing, I carefully examined the photo to identify the most damaged areas. This step is crucial because over-editing can erase authentic details - preserving the car’s original structure was a priority.
Step 2: Removing Scratches and Repairing Physical Damage
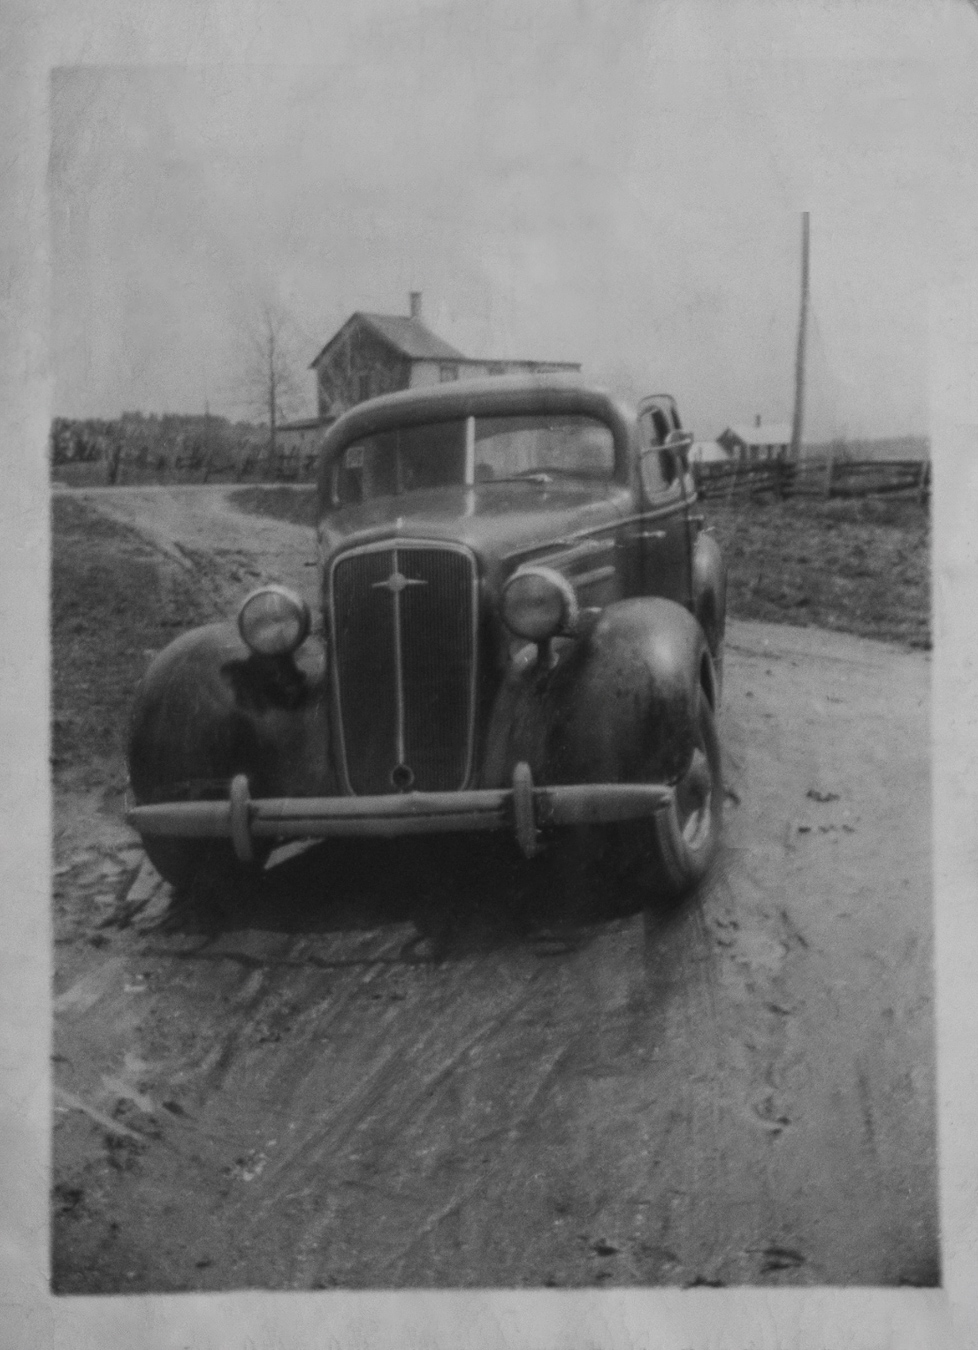
The most labor-intensive part of restoration involves repairing physical damage without altering the original composition.
Techniques Used:
Photoshop scratch correction filter for quick removal of major flaws
Lightroom Healing Brush - To remove scratches while preserving textures
Manual Dust Removal - Eliminating small imperfections one by one in Lightroom
Challenge: Some deep folds required reconstructing missing details (like the grille, which was quite challenging) using reference images of a 1934 Chevrolet Master to ensure accuracy. Additionally, the photo was taken on a dirt road, requiring decisions about whether marks on the road were part of the original texture or actual scratches.
Step 3: Improving Contrast and Lighting
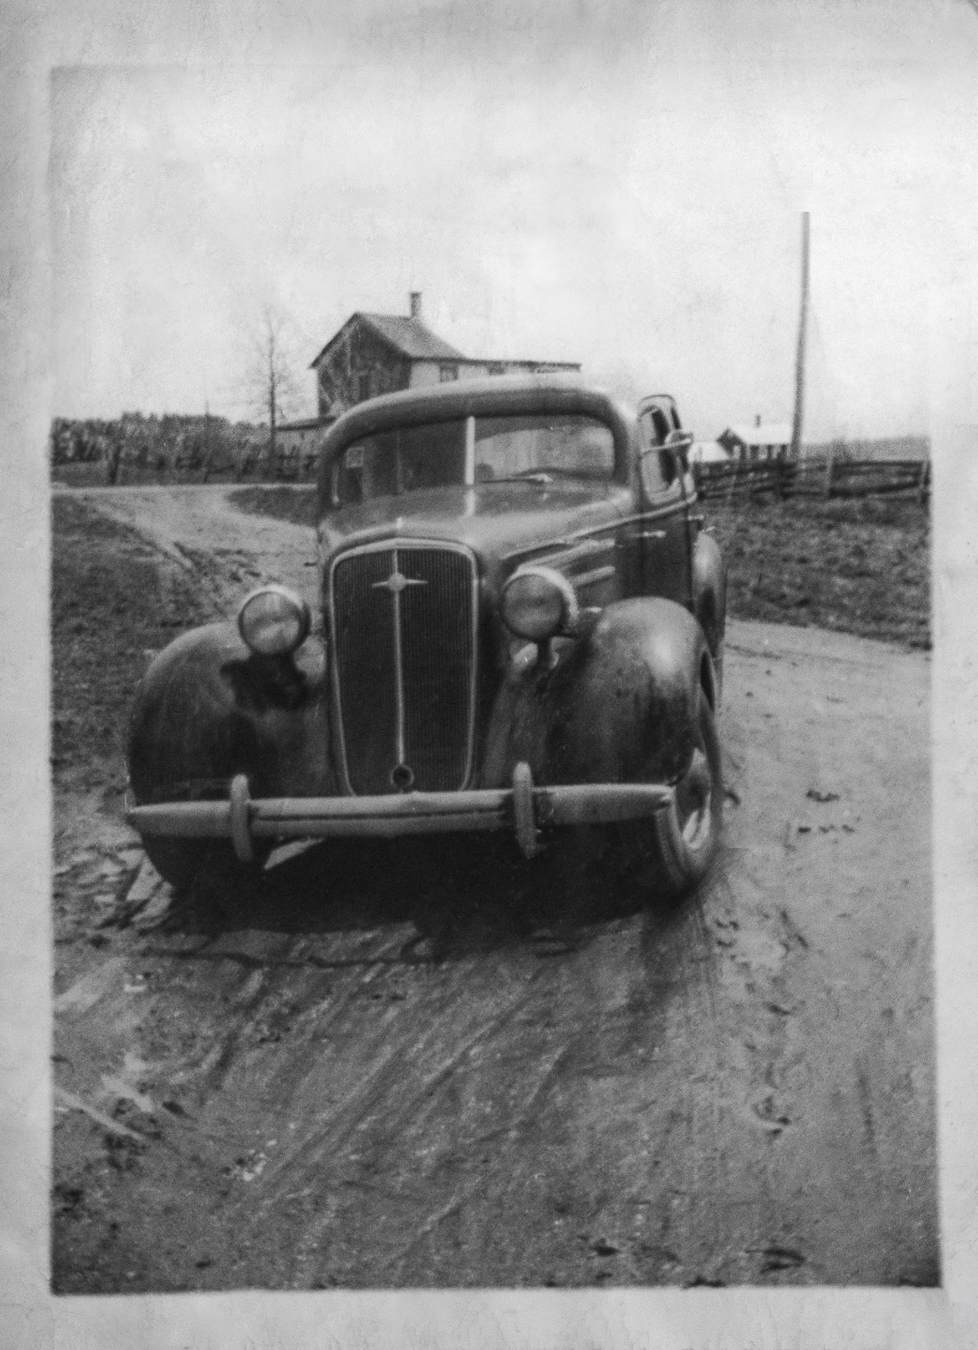
Old photos often lose contrast, making them look dull. Readjusting lights and shadows brings back depth.
Adjustments Made:
Lightroom Levels & Curves - To restore a full tonal range (deep blacks to brighter whites)
Various other adjustments in Lightroom
Result: The chrome and body curves are much more defined, giving a more three-dimensional appearance. The sky is whiter. The car stands out more from the rest of the scene.
Step 4: Refining and Adding Realism
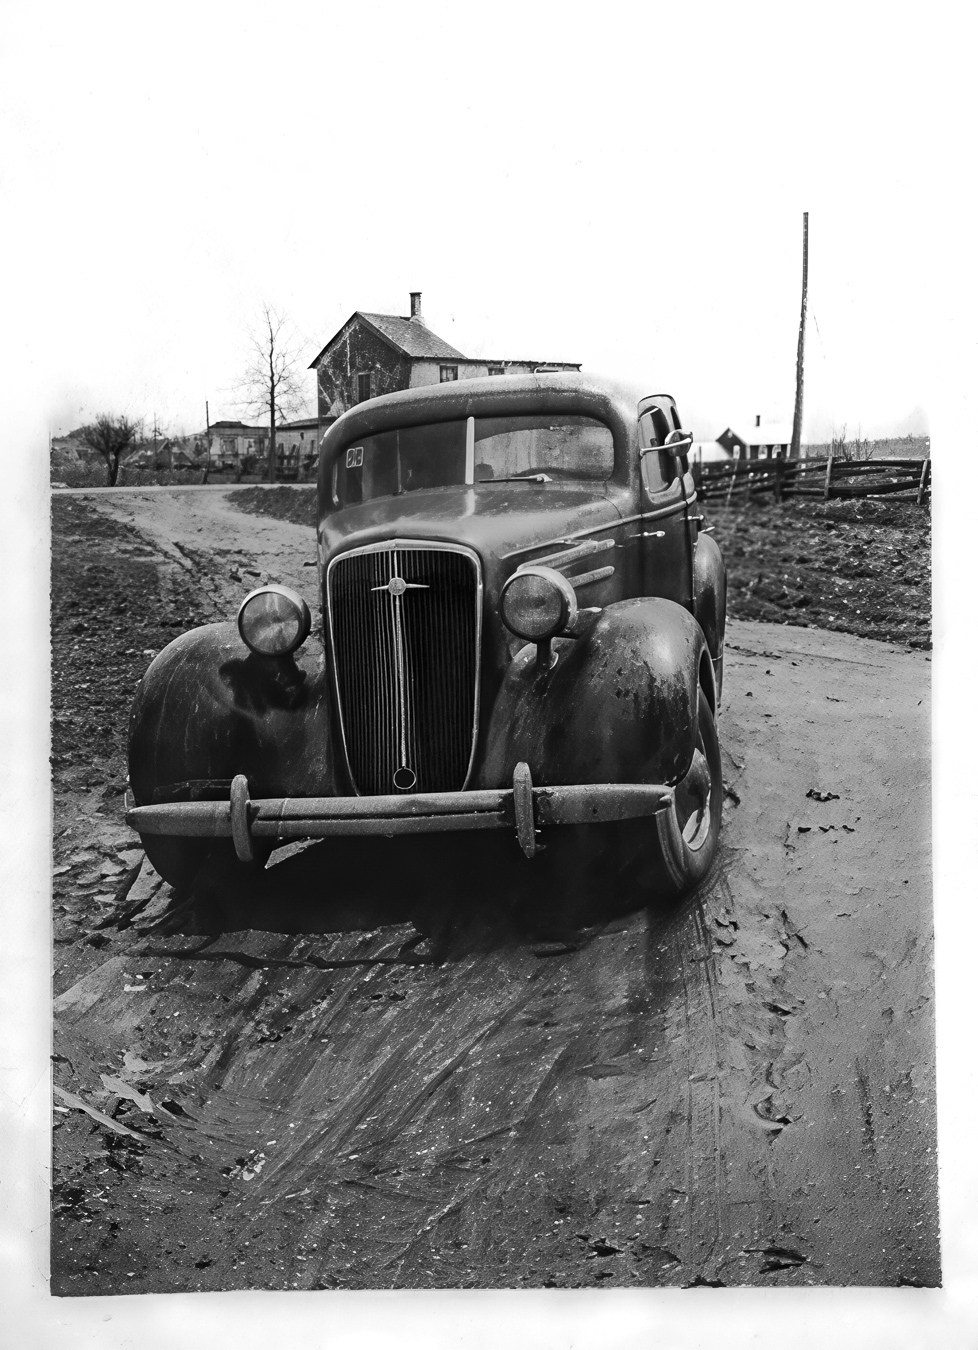
After cleaning and balancing, the next step was to enhance realism by refining fine details.
Key Improvements:
Improved blur with various tools
Manual Retouching - Correcting blurry areas (particularly the grille, but also in the background scene)
Why It’s Important: Without this step, the photo might look “too smooth” and lose its vintage authenticity.
Step 5: Colorization - Bringing the Chevrolet Master Back to Life
The final (and most rewarding) step was adding color to the restored photo.
Result: A realistic colorization that makes the photo look recently taken, while keeping some signs of wear on the car.
Before & After: The Complete Transformation
The difference between the damaged original and restored version is striking. What was once a faded memory is now a sharp, living image of automotive history.
Why Photo Restoration Matters
Restoring old photos isn’t just about repairing damage - it’s about preserving stories. Whether it’s a family heirloom or a classic car like this 1934 Chevrolet Master, each restored photo keeps history alive for future generations.
Do you have a photo to restore? If you have a damaged photo that deserves a second life:
Contact me hereor
Check out my packages hereFinal Thoughts
This 5-step process (repair → clean → enhance → refine → colorize) can bring almost any old photo back to life. Have you ever tried restoring a photo? Which step seems most challenging to you?